For Developers
If your are a developer and want to make an addon for FancyMenu or integrate FancyMenu in your mod, you should take a look at the developer documentation.
Getting Started
The first time using FancyMenu can be a bit overwhelming, but don't worry, most of it is actually pretty self-explanitory once you start working with it!
The Menu Bar
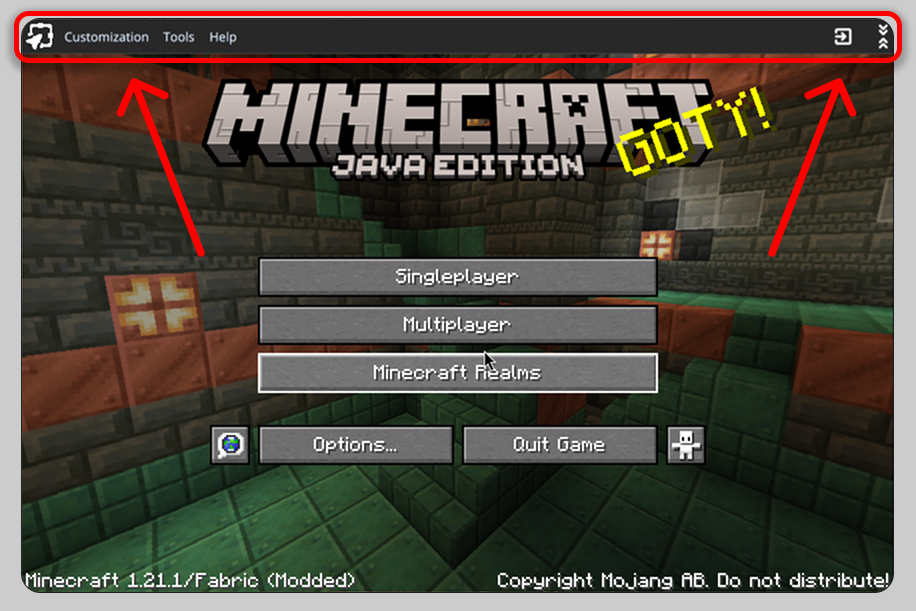
One of the first things you will notice when starting the game is the menu bar at the top of every menu.
The menu bar is your entry point to basically all of FancyMenu's features like creating layouts to customize menus, changing the window title and icon and much more.
Your First Layout
Since you probably want to customize Minecraft's menus, let me tell you something about layouts!
Layouts are like customization layers for menus and they allow you to add new elements and customize existing ones.
To make a new layout for a specific menu:
- Open the menu you want to create a layout for (the Title Screen for example)
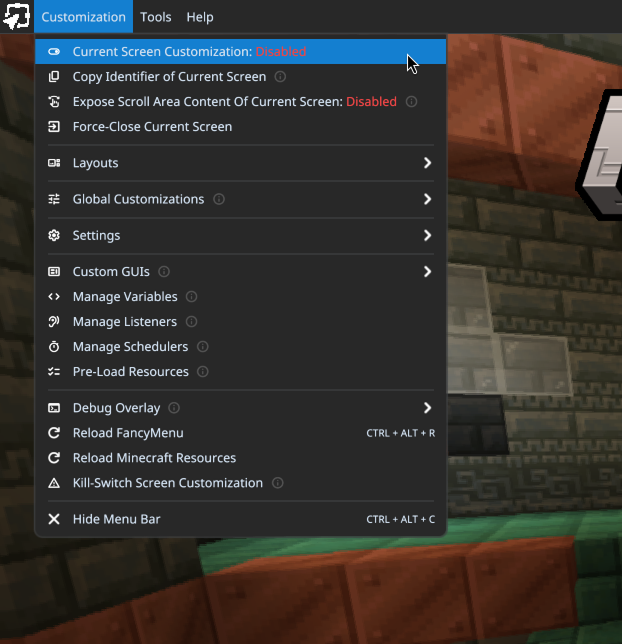
- Open the Customization tab of the menu bar
Customizations are disabled for all menus by default and you need to activate them for every menu you want to customize, so let's click on the "Current Screen Customization: Disabled" entry first, which will switch the toggle to Enabled.
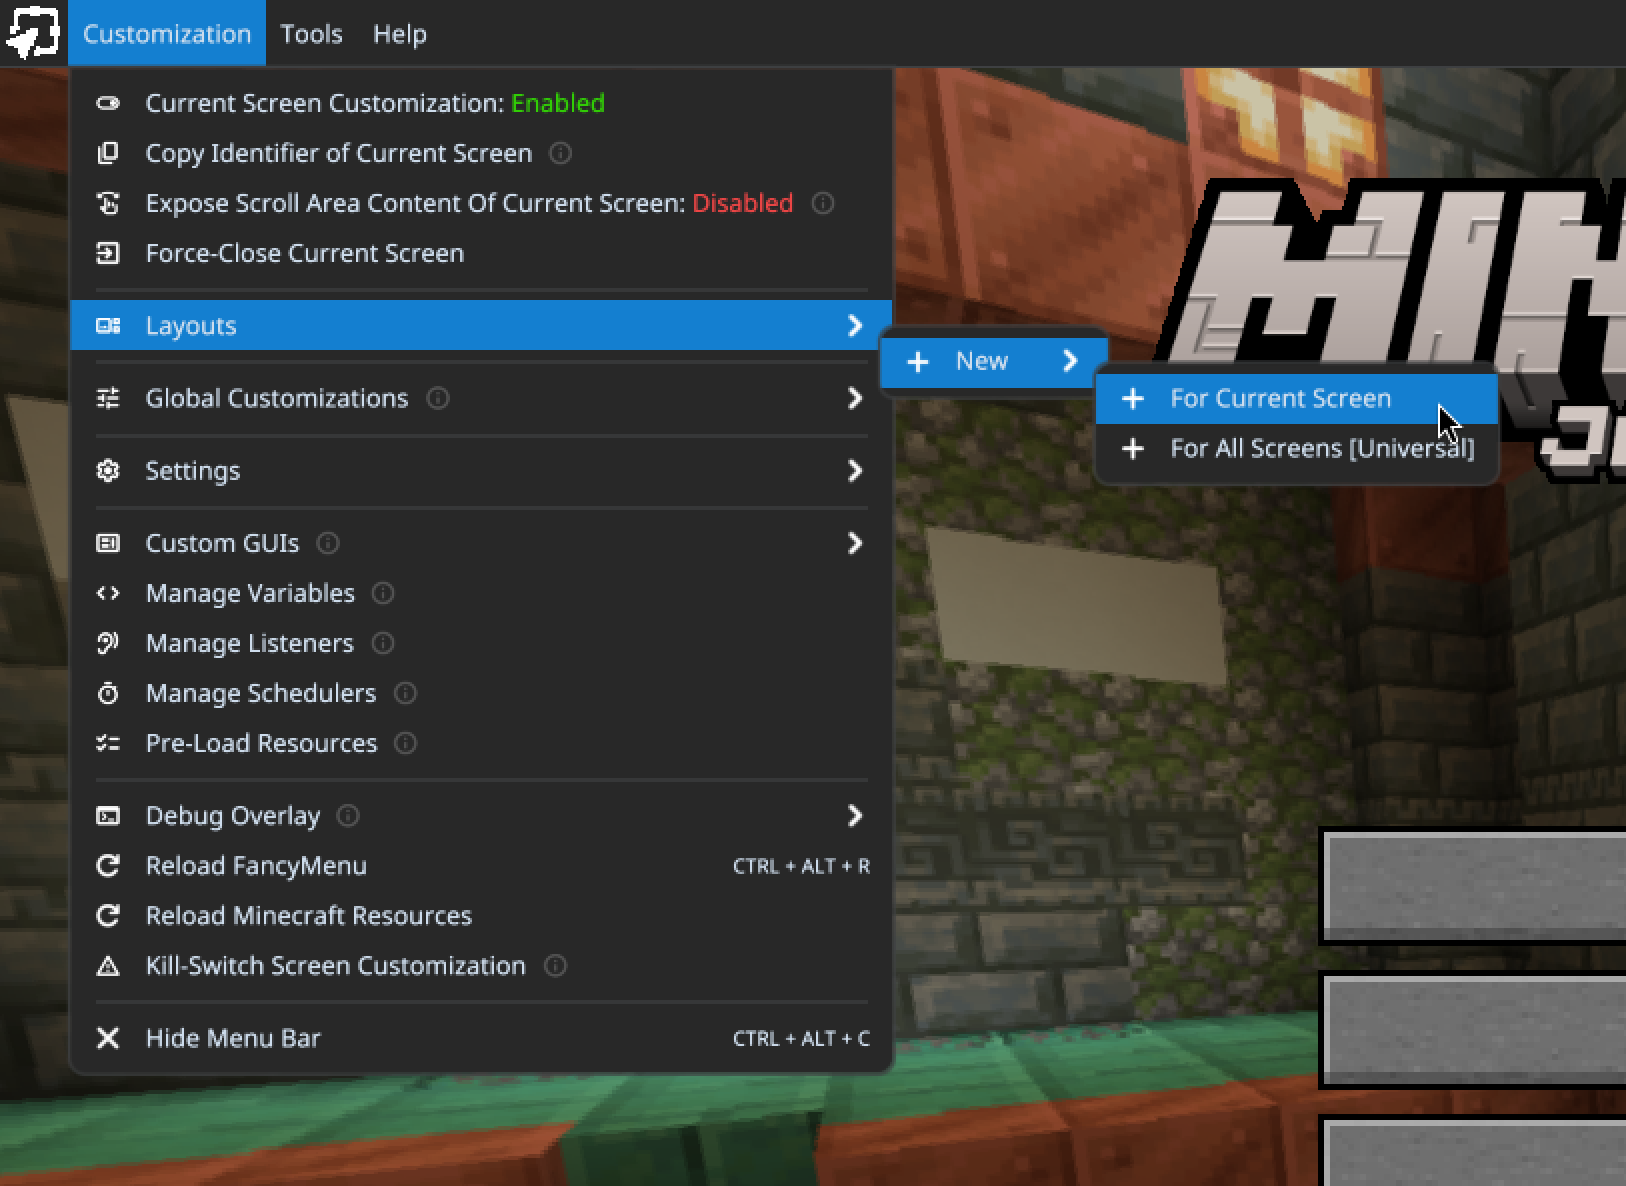
After doing that, click on Layouts -> New -> For Current Screen.
This will open the layout editor where you can add elements to the layout and customize Vanilla and mod elements (like buttons).
Editing the Layout
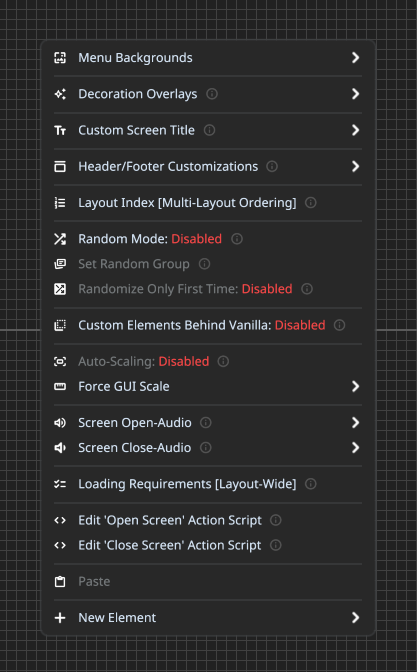
Most customization options can be accessed by right-clicking the editor background.
Doing that will open a context menu with lots of options, like customizing the menu backround or adding elements to the layout.
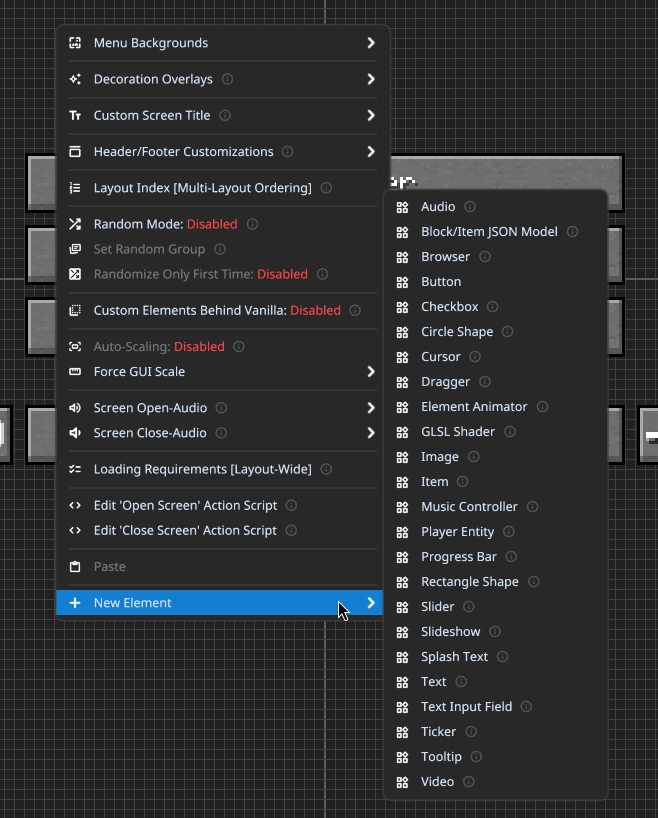
Adding Elements to Layouts
To add a new element to your layout, right-click the background of the editor.
In the context menu that opens, click on New Element and choose one of the many types of elements.
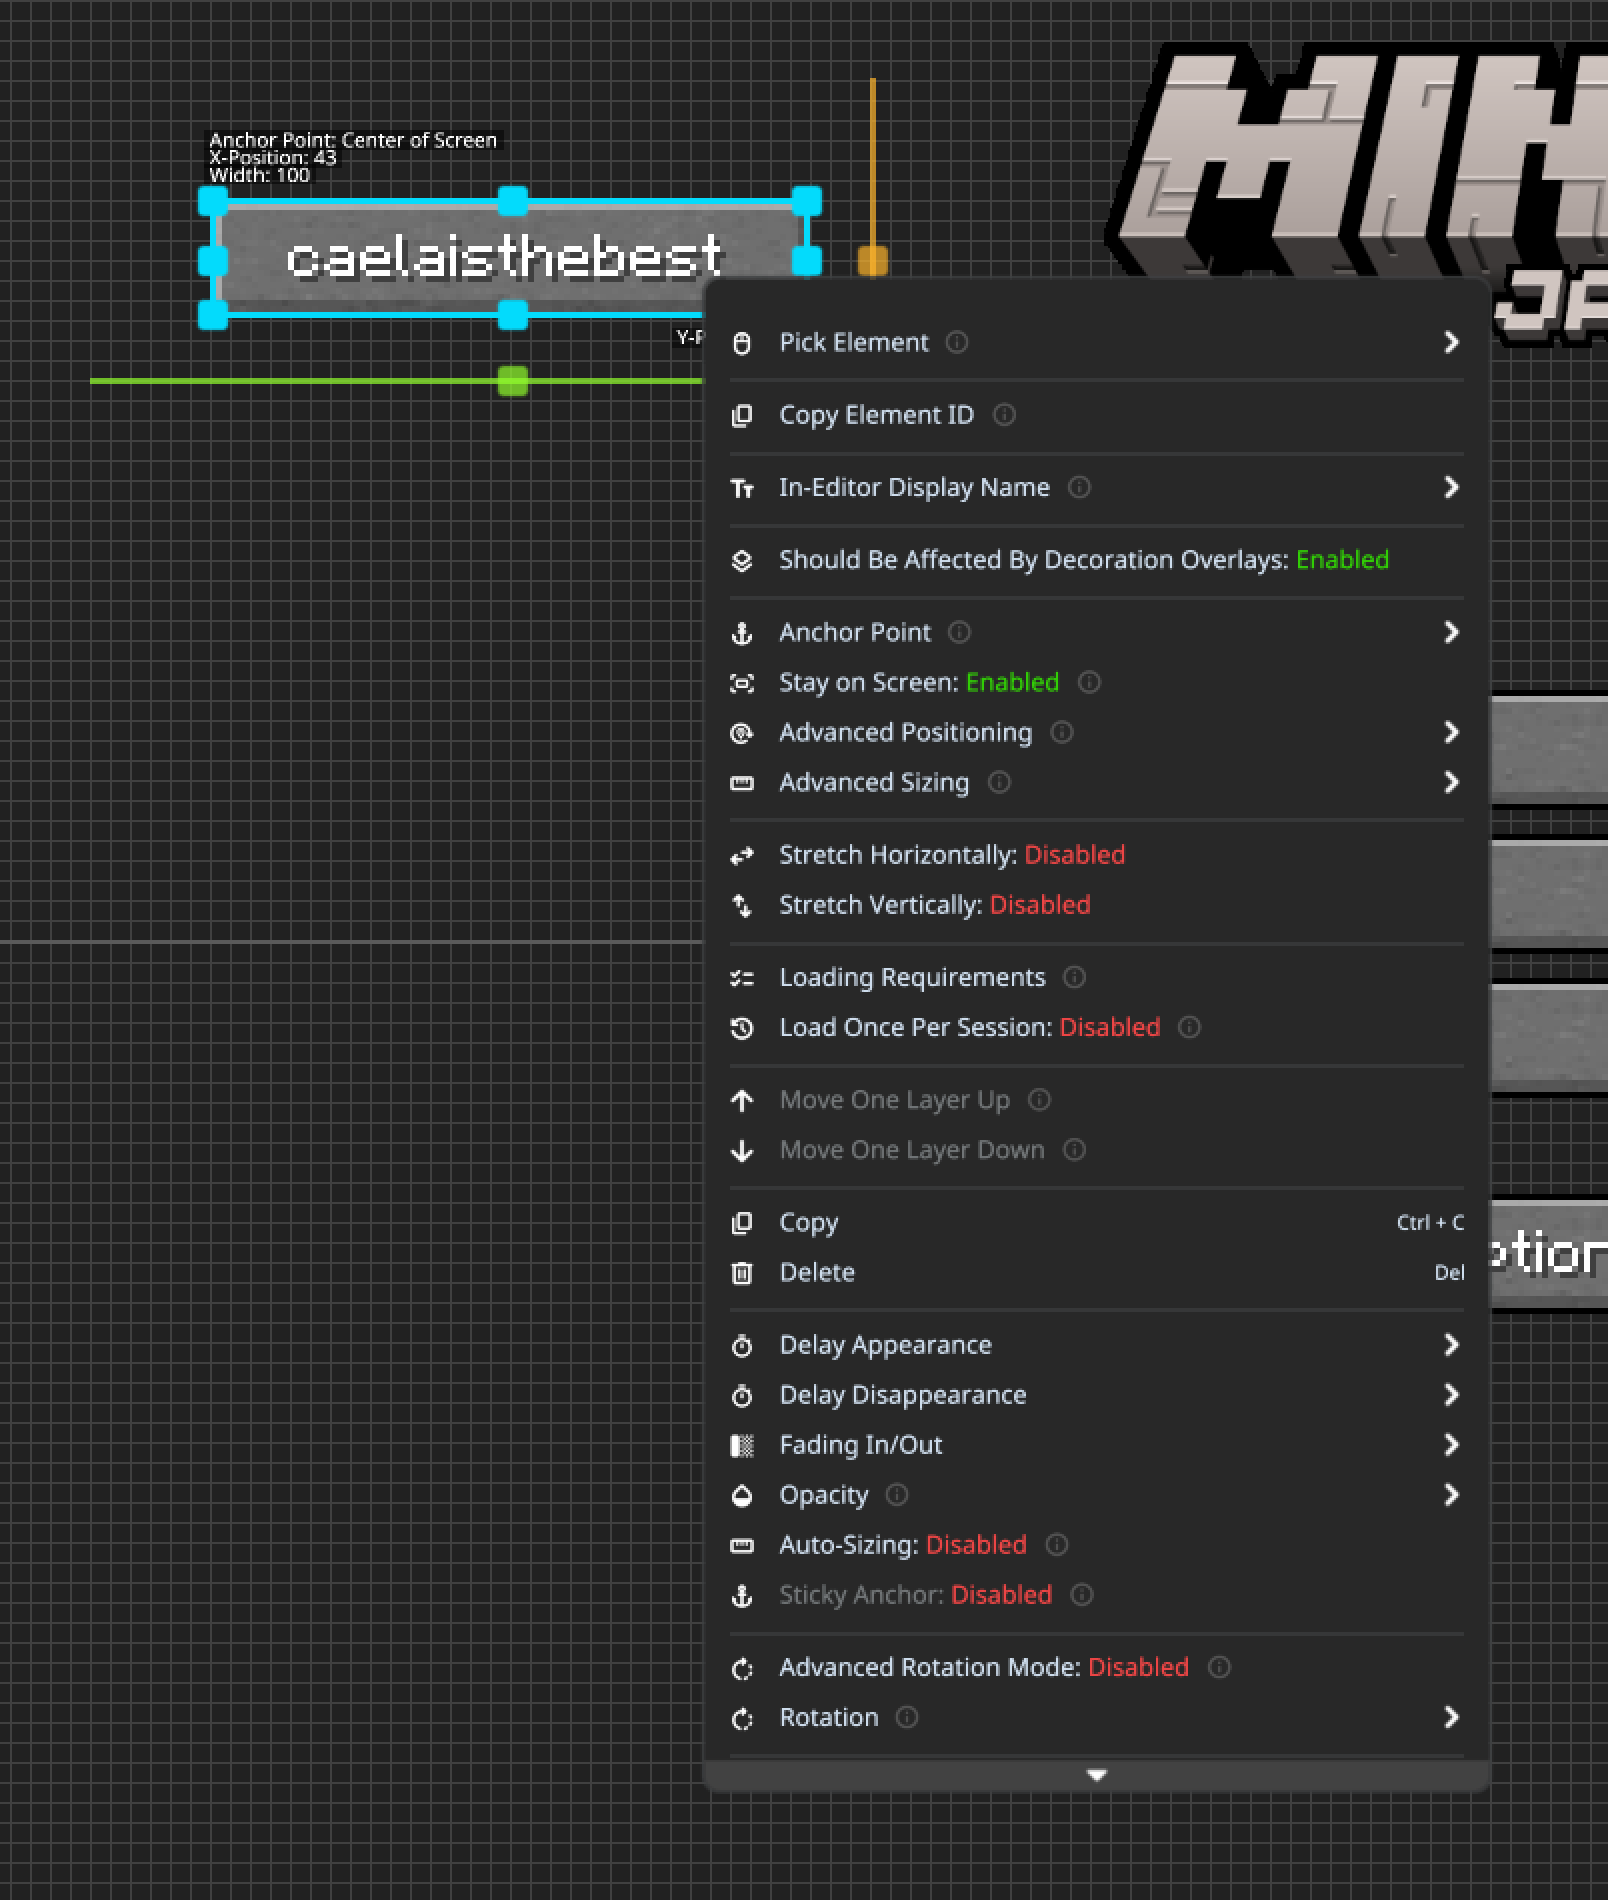
Customizing Elements
To customize an element, right-click it, which will open a context menu with everything you can customize for that element type.
As well as elements you've added, you can also customize vanilla elements (however there are sometimes less options with those)
Positioning Elements
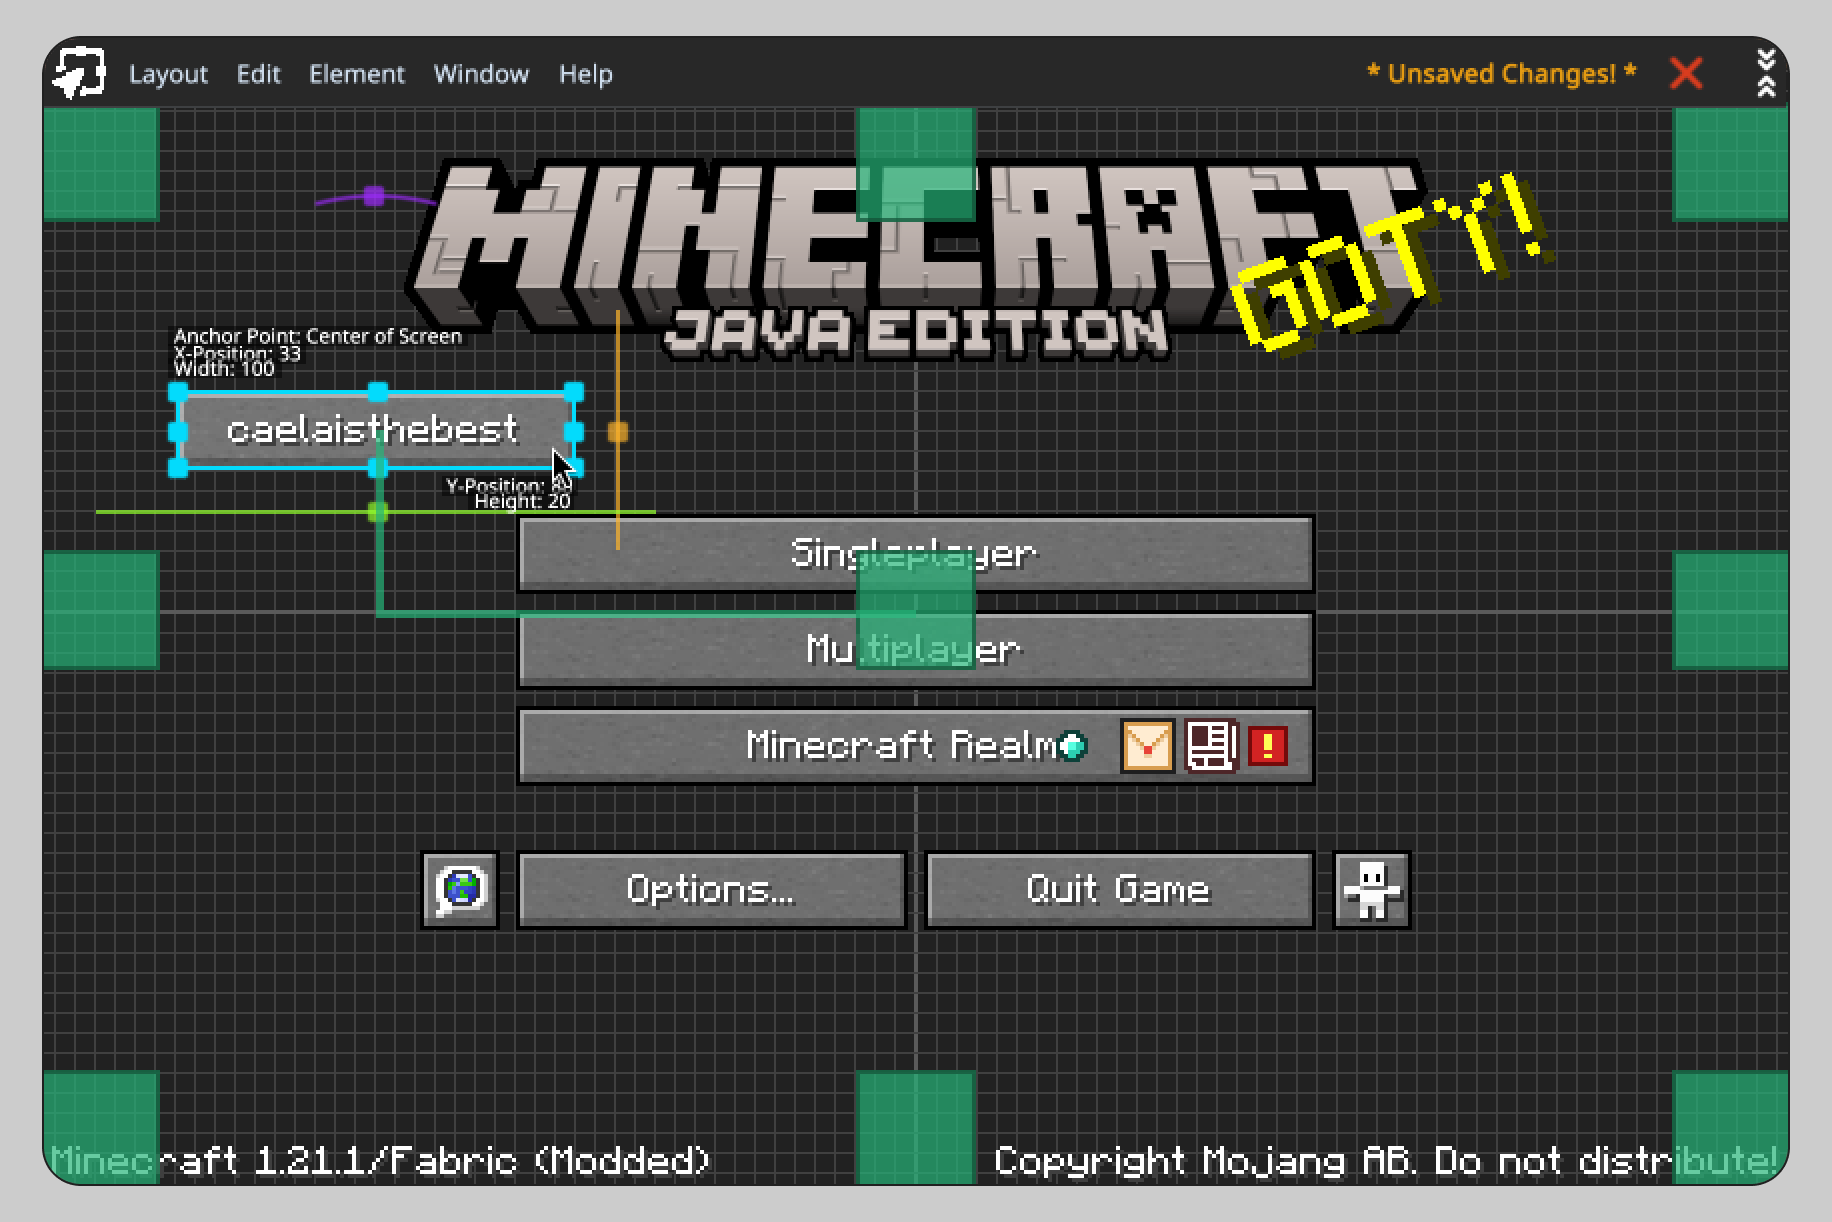
Every element in FancyMenu is connected to an anchor point.
Anchor points are necessary for calculating an element's position and if used correctly, they prevent elements from overlapping each other, going out-of-screen or move to the wrong place when resizing the window.
They are the origin point from where the element's position is getting calculated.
By default, elements are connected to the "Center of Screen" anchor point, which is basically just the exact center of the screen, no matter the window size.
So lets say an element is 2 centimetres away from the center of the screen while being connected to the "Center of Screen" anchor. In that case, the element will always be 2 centimetres away from the screen's center, no matter the window size.
You can see the anchor point an element is connected to when dragging it. This will (by default) also show all other anchor points. You can hover an anchor point while dragging an element to change the element's anchor to the hovered anchor point.
You can even use an element as an anchor point for other elements! Just hover an element while dragging another and the dragged element's anchor point will get changed to the hovered element.
Learn more about how to position your elements.
Saving Your Work
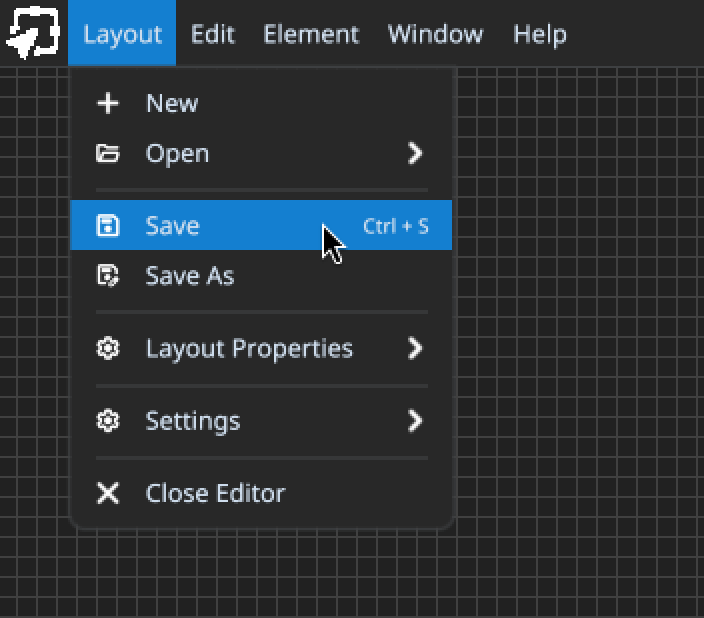
Don't forget to save your masterpiece!
You will see an "Unsaved Changes" indicator in the top-right corner of the editor if you need to save your changes before closing.
Save your work by clicking on Layout -> Save!
Congratulations! You can now make Minecraft's menus look a lot more beautiful!