Working with Minecraft Options in FancyMenu
FancyMenu allows you to get and set Minecraft game settings (options) using different UI elements. This guide will show you how to use buttons, sliders, and tickers to work with Minecraft options in your custom menu layouts.
Understanding Minecraft Options
Minecraft has many built-in options that control everything from graphics settings to sound volume. FancyMenu lets you access these options by their names.
Some common option names include:
soundCategory_master- Main volumesoundCategory_music- Music volumesoundCategory_ambient- Ambient sounds volumesoundCategory_players- Player sounds volumesoundCategory_blocks- Block sounds volumefov- Field of viewgamma- BrightnessrenderDistance- Render distance
Displaying Option Values
You can display the current value of any Minecraft option using a special placeholder.
The placeholder looks like this:
{"placeholder":"minecraft_option_value","values":{"name":"option_name"}}
Replace option_name with the actual option name you want to display.
Setting Options with Buttons
Buttons can be used to set specific values to Minecraft options.
How to set up a button:
- Create a new Button element
- Set the button label (what appears on the button)
- Add an action: Right-click on the button → Edit Action Script → Add Action → Set Minecraft Option Value
- In the "Set Minecraft Option Value" window:
- Name: Enter the option name (like
renderDistance) - Value: Enter the value to set (like
16)
- Name: Enter the option name (like
Example:
Creating a button that sets render distance to 16 chunks:
- Option Name:
renderDistance - Value:
16 - Label: "Set Render Distance to 16 chunks"
Setting Options with Sliders
Sliders are perfect for options with a range of values, like volume settings or brightness.
How to set up a slider:
- Create a new Slider element
- Set the slider type:
- For whole numbers (like render distance): Choose "Integer Range"
- For decimal numbers (like volume): Choose "Decimal Range"
- Set minimum and maximum values
- Add an action to set the Minecraft option:
- Right-click → Edit Action Script → Add Action → Set Minecraft Option Value
- Name: The option name
- Value:
$$value(this special variable contains the current slider value)
- Set the pre-selected value to the current option value:
- Set "Pre-Selected Value" to
{"placeholder":"minecraft_option_value","values":{"name":"option_name"}}
- Set "Pre-Selected Value" to
Example slider label formats:
To show the current option value in the slider label, use:
Volume: {"placeholder":"minecraft_option_value","values":{"name":"soundCategory_master"}}
To show a percentage (useful for volume):
Volume: {"placeholder":"calc","values":{"expression":"$$value * 100.0","decimal":"false"}}%
Setting Options with Tickers
Tickers are invisible elements that can change options automatically on a schedule.
How to set up a ticker:
- Create a new Ticker element
- Configure the tick settings:
- Tick Mode: Choose when the option should update
- Tick Delay: Set how often it updates (in milliseconds)
- Add the action to set a Minecraft option:
- Right-click → Edit Action Script → Add Action → Set Minecraft Option Value
- Set the option name and value
Example:
Setting gamma (brightness) to maximum when the menu loads:
- Tick Mode: On Load Screen
- Name:
gamma - Value:
1.0
Common Use Cases
Here are some common cases for what you can do when using FancyMenu to set and get Minecraft options.
Creating Custom Volume Sliders
Volume sliders are a common use for the Minecraft option integration. Here's how to make a custom music volume slider:
- Create a new Slider element
- Set the "Slider Type" to "Decimal Range"
- Set the "Minimum Range Value" to "0.0"
- Set the "Maximum Range Value" to "1.0"
- Edit Action Script → Add Action → Set Minecraft Option Value
- Set Name to
soundCategory_music - Set Value to
$$value
- Set Name to
- Set "Pre-Selected Value" to
{"placeholder":"minecraft_option_value","values":{"name":"soundCategory_music"}} - To display the volume as a percentage, set the label to:
Music: {"placeholder":"calc","values":{"expression":"$$value * 100.0","decimal":"false"}}%
You can create similar sliders for other sound categories:
- Master Volume:
soundCategory_master - Music:
soundCategory_music - Ambient:
soundCategory_ambient - Blocks:
soundCategory_blocks - Players:
soundCategory_players - Weather:
soundCategory_weather
Creating a Custom FOV Slider
Field of View (FOV) is an important graphics setting that determines how wide your view is in the game. The FOV option internally uses values from -1.0 to 1.0, but displays as 30 to 110 in the UI.
Understanding the FOV Value Mapping
- Internal value range: -1.0 to 1.0
- Display value range: 30 to 110
- Mapping formula:
(internal_value + 1) * 40 + 30
Step 1: Create a Ticker Element to Update FOV Text
First, we need a ticker that will check the current FOV value and set a variable with the appropriate description:
- Create a new Ticker element
- Set the "Tick Mode" to "Normal" (so it updates constantly)
- Set the "Tick Delay" to around "10" (milliseconds) to avoid excessive checks
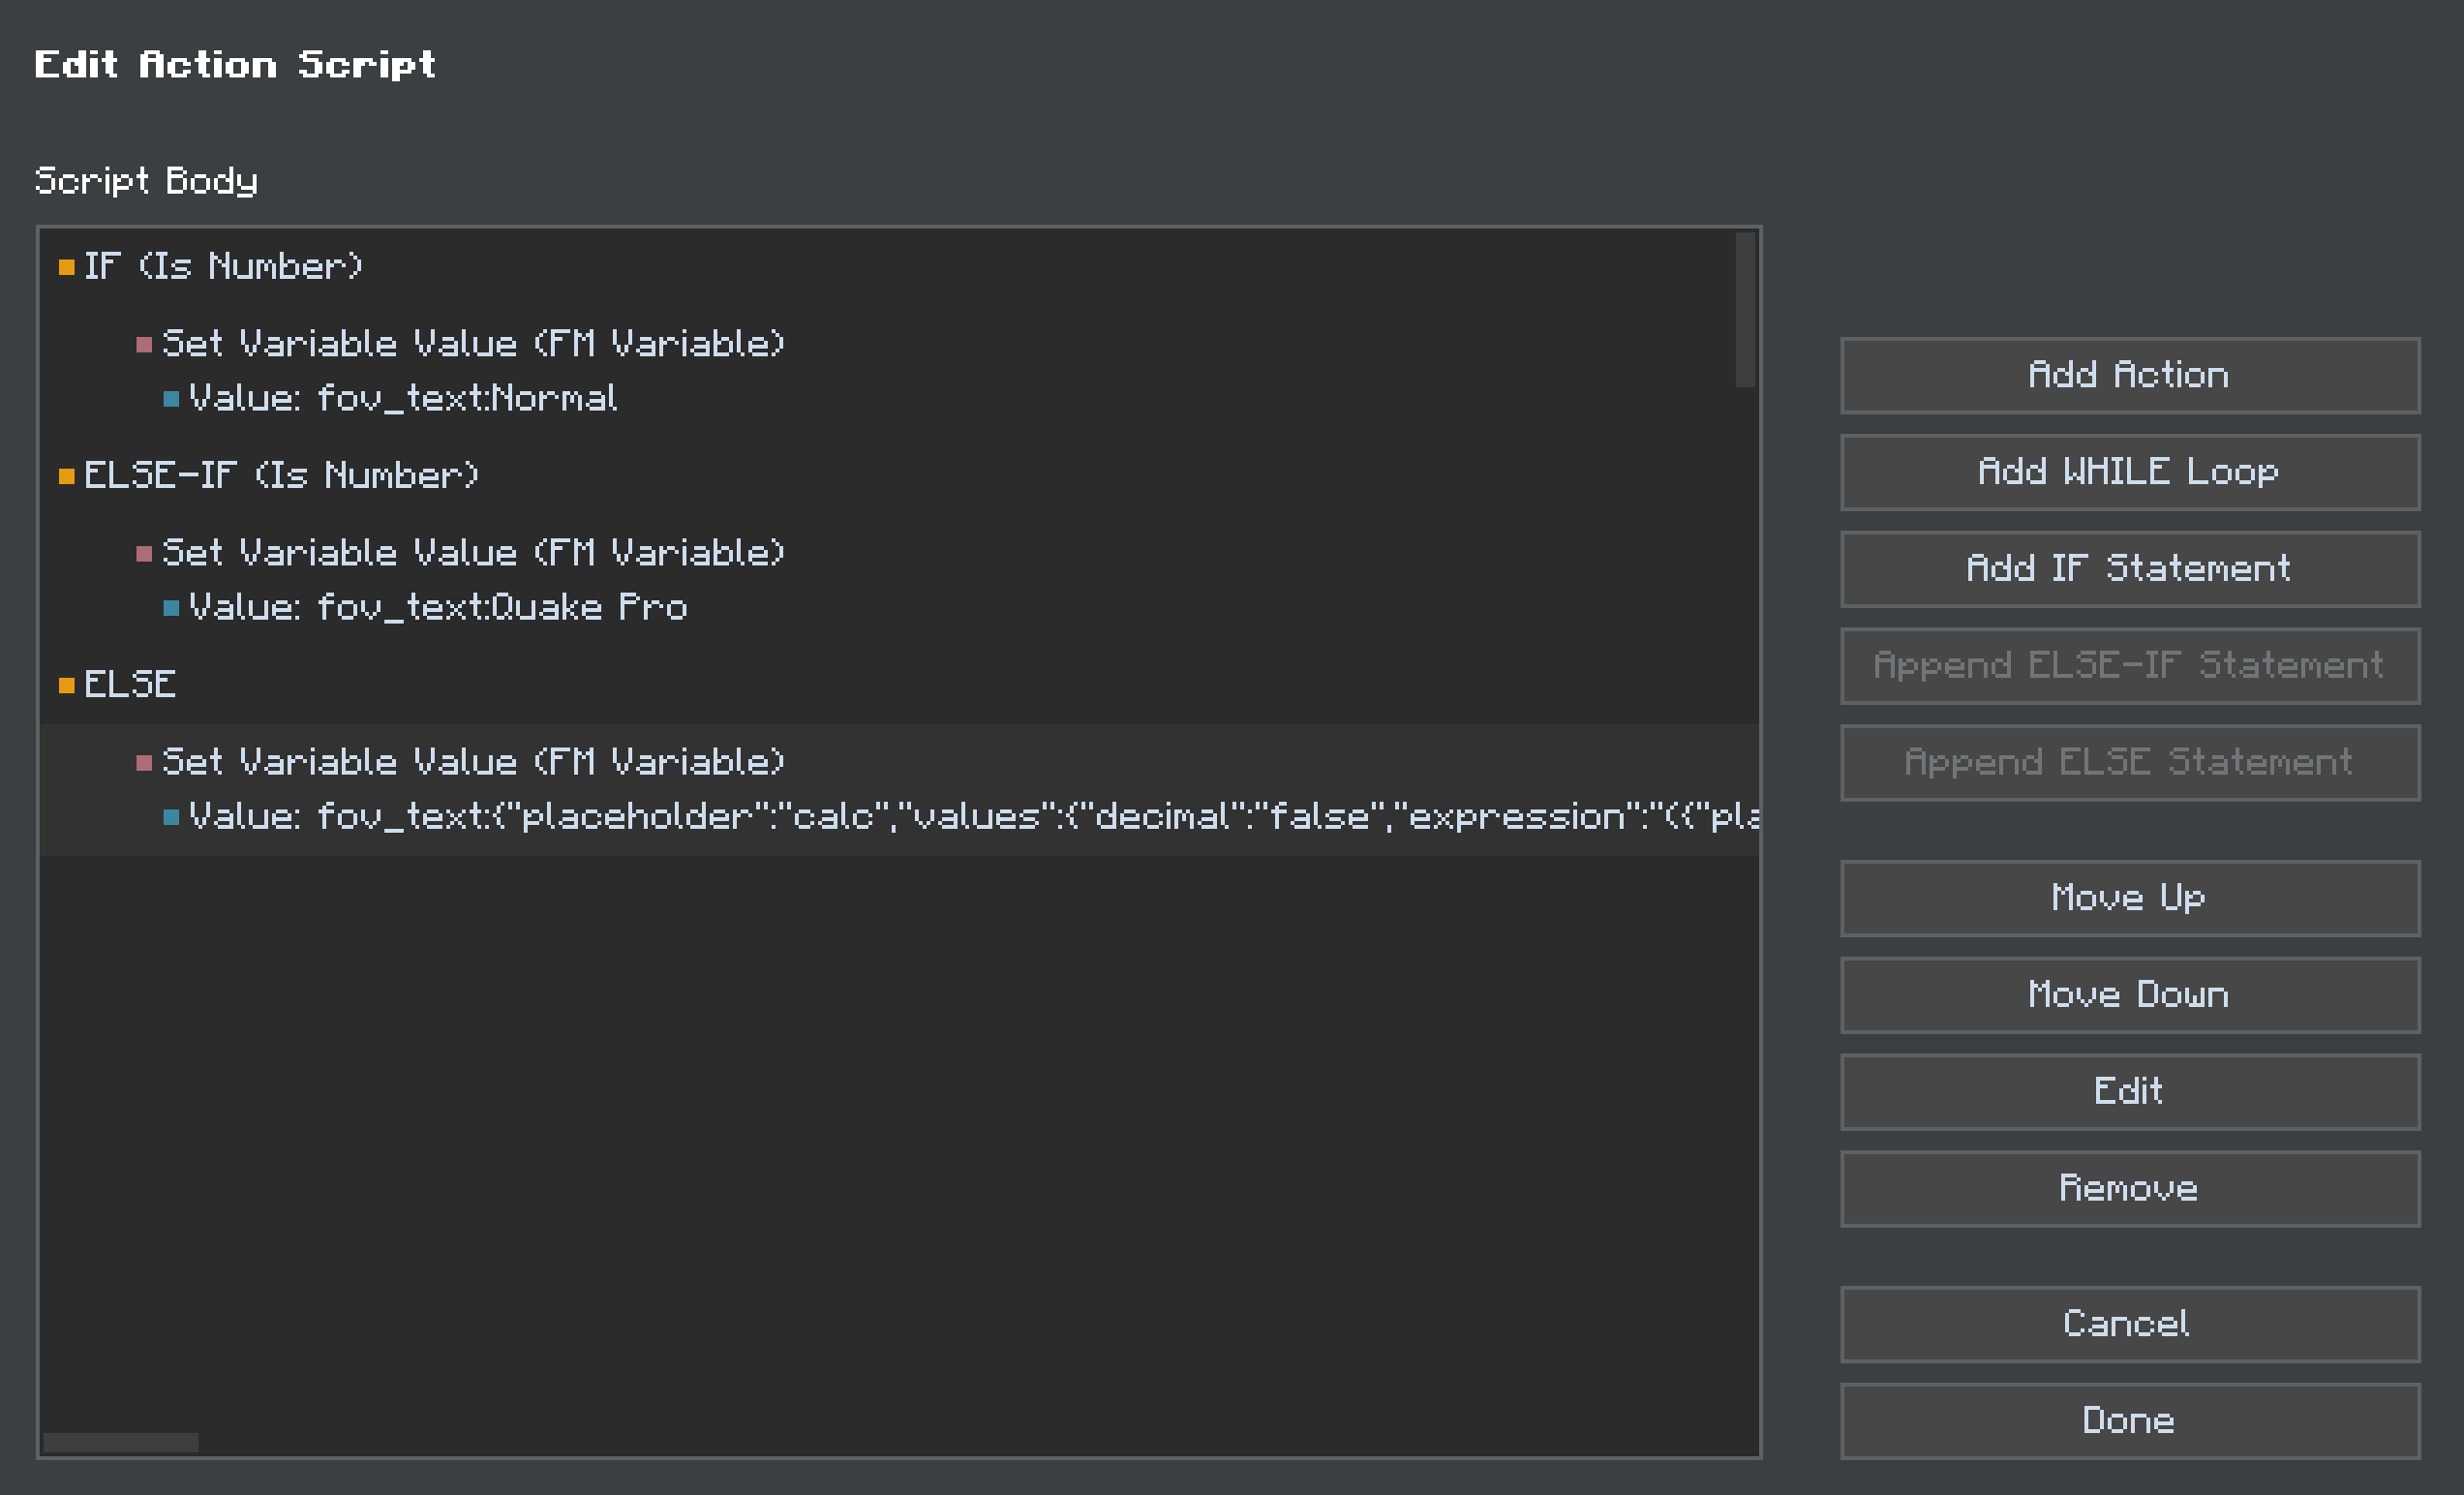
Now we need to set up actions for the FOV labels. Here's what your action script structure should look like:
▶ Action Script
│
├─▶ IF (mapped FOV = 70)
│  └─■ Set Variable Value: fov_text:Normal
│
├─▶ ELSE-IF (mapped FOV = 110)
│  └─■ Set Variable Value: fov_text:Quake Pro
│
└─▶ ELSE
   └─■ Set Variable Value: fov_text:[calculated numeric value]
Let's set up each part:
Set up the "Normal" FOV Label:
- Right-click → Edit Action Script → Add Action
- Click "IF Statement" to add a conditional block
- Set the requirement to "Is Number" with:
- Compare Mode: "equals"
- Number:
{"placeholder":"calc","values":{"decimal":"false","expression":"({"placeholder":"minecraft_option_value","values":{"name":"fov"}} + 1) * 40 + 30"}} - Compare With: "70"
- Inside this IF block, add "Set Variable Value (FM Variable)" action with:
- Value:
fov_text:Normal
- Value:
Set up the "Quake Pro" FOV Label:
- Inside the Action Script, add "ELSE-IF Statement"
- Set the requirement to "Is Number" with:
- Compare Mode: "equals"
- Number:
{"placeholder":"calc","values":{"decimal":"false","expression":"({"placeholder":"minecraft_option_value","values":{"name":"fov"}} + 1) * 40 + 30"}} - Compare With: "110"
- Inside this ELSE-IF block, add "Set Variable Value (FM Variable)" action with:
- Value:
fov_text:Quake Pro
- Value:
Set up the Numeric FOV Label:
- Add an "ELSE Statement" block
- Inside this ELSE block, add "Set Variable Value (FM Variable)" action with:
- Value:
fov_text:{"placeholder":"calc","values":{"decimal":"false","expression":"({"placeholder":"minecraft_option_value","values":{"name":"fov"}} + 1) * 40 + 30"}}
- Value:
Step 2: Create the FOV Slider
- Create a new Slider element
- Set the "Slider Type" to "Decimal Range"
- Set the "Minimum Range Value" to "-1.0"
- Set the "Maximum Range Value" to "1.0"
- Edit Action Script → Add Action → Set Minecraft Option Value
- Set Name to
fov - Set Value to
$$value
- Set Name to
- Set "Pre-Selected Value" to
{"placeholder":"minecraft_option_value","values":{"name":"fov"}}
Step 3: Set the Slider Label
Set the slider label to simply display the FOV text variable:
FOV: {"placeholder":"getvariable","values":{"name":"fov_text"}}
This label will show:
- "FOV: Normal" when the value is 70
- "FOV: Quake Pro" when the value is 110
- "FOV: 85" (or any other number) for all other values
Tips for FOV Sliders
- The internal slider value range is -1.0 to 1.0, which needs to be mapped to 30 to 110 for display
- The conversion formula is:
(internal_value + 1) * 40 + 30 - Only two values have special labels: 70 (Normal) and 110 (Quake Pro)
- The default FOV in Minecraft is 70 (which corresponds to internal value 0.0)
- The
fov_textvariable automatically contains either the special label or the numeric value
Displaying Option Values in Text Elements
You can also display current option values in Text elements:
- Create a Text element
- For the text content, use the placeholder:
{"placeholder":"minecraft_option_value","values":{"name":"option_name"}}
For example, to show the current render distance:
Current render distance: {"placeholder":"minecraft_option_value","values":{"name":"renderDistance"}} chunks
Finding Option Names
You can find the names of all available options by:
- Creating a button
- Right-clicking it
- Clicking "Edit Action Script"
- Adding "Set Minecraft Option Value" action
- When editing the action's value, look at the dropdown suggestions when you start typing in the "Name" field
Important Tips
-
Valid Values: Not all options accept all values. For example:
- Volume options accept values from 0.0 to 1.0
- Render distance typically accepts whole numbers from 2 to 32
- Boolean options (true/false) like
pauseOnLostFocusaccept "true" or "false"
-
Testing: Always test your settings to make sure they work as expected!
-
Visual Feedback: Give users visual feedback about the current value using the placeholders described above.